Showing posts with label double crochet (US singles). Show all posts

Tuesday, 15 May 2012

Another doll gets a Mama Sanchez makeover because off-the-peg just doesn't cut it!


What on earth have I started?  I only started making dolls' clothes because the outfits that The Little Mermaid is sold with are woefully inadequate and always result in her being half naked.  Now, it seems I have set a precedent for knitted/crocheted outfits and as soon as the girl gets a new doll her clothes are taken off and I'm told 'Mummy, she doesn't like her dress - she would like a knit one'.   To be fair, they are so much more durable than the shop bought ones which fray so quickly!

  
So of course, Tinker Bell was no exception and I was told she wanted a ballerina dress.  Tinker Bell just wouldn't be right if she were not wearing leaves, so I set about designing a ballerina-style leaf dress.  I made three different iterations of knitted ones and threw them all away.  The girl loved them all so I had to sneak them into the bin when she wasn't looking!


This isn't an exact pattern as Tinker Bell is smaller than a 'standard' doll so if you're planning on making this for your Barbie, following what I did simply wouldn't work.  I will guide you through making it to measure for your doll.

I used approximately 25g of a random mystery yarn for the main body of the dress and worked the contrast vein and edging on the leaves in Twilley's goldfingering.  I used a 3.0mm hook but you can use whatever yarn and hook you like.  I work to quite a tight tension so you may want to drop down a few hook sizes because big stitches just won't look right on a such a small garment.  Just remember not to use a hook that is far too small for your yarn because the garment will end up too tight and without stretch - a good choice would be to use yarn that knits to a 2.5mm needle with a 2.5mm hook.

The dress body is worked in entirely in trebles and treble decreases, with joining and without turning.  I 'step up' to the next round with 2ch and work the first treble back into the slip stitch.  You will also need to work a few doubles for the shoulder strap section.  Familiarise yourself with and refer to crochet stitch summary and terminology because I write all my patterns using UK terminology.  


1.  Work a test length of trebles
Before you set about making your leaves, work a test swatch of a row of treble crochet.  Work a multiple of four stitches that will fit around your doll's hips comfortably.  Do not just work a length of chain and assume that is a good enough test - the trebles will loosen up the work!

2.  Make your leaves
Divide your number of chains by 4 and make that number of large leaves and that number again of small leaves from my lovely little leaves post (I worked 24 chain so made 6 each of large and small leaves) 

 3.   Start the body of your dress
Work a length of chain of the required length, making sure not to twist the chain, slip stitch to the first chain.  Ch2 (doesn't count as a stitch) then work a round of tc working the first round in the sl st.

4. Attach large leaves in round 2
The leaves are worked into the dress by inserting the hook into the round end of a leaf after the yarn over but before inserting it into the main body of the work.  Draw the hook through both layers of work and work a tc in the usual manner.

 
Attach large leaves in the second round in the following manner: ch 2, attach first leaf into the sl st, 3 tc, (attach leaf, 3 tc) until all leaves are attached, sl st to the first tc to join the round  

5.  Attach small leaves in round 3:
Attach small leaves in this round in the following manner: 2 tc, (attach leaf, 3 tc) until all leaves are attached, sl st to the first tc to join the round 

6.  Keep working straight until the skirt is the desired length
Remembering thr 2ch 'step up', hold your work up to the doll's waist and stop when you reach the desired length

7.  Decrease for the waist
Ch2, tc into the sl st, tc, tc2tog, (2 tc, tc2tog) to end, sl st to the first tc to join the round   

8.  Keep working straight until the bodice is the desired length
Remembering the 2ch 'step up', hold your work up to the doll's waist and stop when you reach the desired length

9.  Work the straps
I like to put aside a quarter of the stitches for the front middle.    After the last sl st, work a length of chain sufficient to pass over the shoulder from the centre-back, sl st to the stitch to the side of the middle quarter stitches.  Dc the middle stitches, sl st to the next stitch then work another shoulder strap.  Sl st to the beginning of the round and tie of securely and weave in loose ends.


The photo shows two 'looks'.  Working the contrast edge on the leaves gives them a convex/concave quality - you decide which look you like best by simply popping them in the desired direction.

Thursday, 8 March 2012

Make 'em carry their own water bottle!!!

I've got to that stage now where I don't need to carry about the world's biggest change bag (has anyone else noticed that the bigger the change bag, the more junk we cram into it?) because I have both of my kids out of nappies.... Woo hoo!!!  Of course, it is inevitable that when I head out on foot with a 3 year old girl and a 21 month old boy to the local cafe that I will end up juggling water bottles on the way home because they can't be bothered to carry them!!
I've made them both water bottle carriers that they can sling over their shoulders, and of course, they enjoy the novelty of carrying them =)  I made them with handles that are attached by crochet buttons.  With the handles removed, the carriers can be used at home as hugger coasters, or, the handles can easily be replaced if they out-grow them.  Why not make one for yourself for taking to the gym?  Or make some for your wine bottles for whne you BYOB =)


The bottle carrier body is made in two main parts: the based is worked in doubles (US singles) in continuous rounds.  I then switched to trebles (US doubles) for the vertical section because they have more stretch in them so can accomodate 'bumpy' bottles better than a carrier worked entirely in doubles.  I worked the green bottle carrier by joining and turning because I wanted a perfectly vertical seam, and the pink one without turning.  Despite the using the same stitch, the look is quite different and the stitches on the pink one are slightly skewed to one side because the work wasn't turned between rounds.

I used yarn that knits to a 4mm needles with a 4mm and a 3.5mm hook, but you can use whatever you have available.

Techniques used (UK terminology):
  • ch: chain
  • dc: double crochet (US single crochet)
  • slst: slip stitch
  • inc: work 2 dc into next stitch
  • dc2tog: insert hook into next hook, yarn over and draw through loop, insert hook into next stitch, yarn over and draw through loop, hook through all three loops
  • tc: treble crochet (US double crochet)
  • back loop only
  • working in continuous rounds
  • working rounds by joining
  • working in continuous rows

Circular base:
With larger hook,

Round 1: Ch 2 and work 6 dc into 2nd chain from hook (or work 6 dc into a magic circle)
Round 2: 2 dc into each st round [12]
Round 3: (1 dc, inc) x 6 [18]
Round 4: (2 dc, inc) x 6 [24]
Round 5: (3 dc, inc) x 6 [30]
Continue increasing 6 stitches per round in this manner until the circle is just bigger than the base of your bottle.  Work one round using only the back loops for a nice little ridge giving the carrier more structure.  Sl st to the next stitch.


Switch to working in trebles:
Switch to smaller hook, ch 3 (forms first tc of round), tc in next stitch and each sticth round, sl st to the top of the 3ch that formed the first tc.

Continue in this manner until work is approproximately 2cm shorter than you want it to finish up. 


Switch to working in doubles for button-hole band:

Switch back to larger hook.
This section, because it is being worked in doubles, can be worked in continuous rounds.  If you choose to turn after each round, Sl st to join the last st of the round to the first, 1ch to 'step up' to the next row height, then work the first dc of the row into the same stitch as the sl st.  You will need a 4ch space for each button-hole and will need to work two button-holes spaced opposite each other.
  • Work 2 rounds dc
  • Dc to button-hole, 4ch while skipping 4st, dc to next button-hole, 4ch while skipping 4st, dc to end
  • Dc to button-hole, work 4ch, dc to next button-hole, work 4ch, dc to end
  • Work 2 rounds dc

Buttons:

Make two
Round 1: 2 chain then work 6 dc into the 2nd chain from hook, or work 6 dc into a magic ring
Round 2: 2 dc into each stitch round [12]
This is a good point to tighten the magic ring completely and weave in the end
Round 3: Work 1 round straight without shaping
Round 4: (dc2tog) x 6 [6]
Weave through the last 6 stitches, stuff tightly with small pieces of waste yarn and pull to tighten. Keep a yarn tail for securing to handle

Work a handle of the required length in doubles or trebles and sew the buttons, one on each end.
.

Saturday, 3 March 2012

Egg cosy/caddy/critter

My first attempt of working crochet in the round was a rather failed one; last Easter, I tried making crochet egg cosies.  It was a disaster and I didn't touch my crochet hooks for over 4 months.  I had found an adorable pattern for crochet egg cosies and thought they would be the perfect first crochet project because they were small and I could make loads for friends as gifts instead of giving them a big chocolate egg.  Anyone who knows crochet (and I do now) knows that doubles (US singles), despite looking beautiful when working in the round have very little stretch to them.  I couldn't get my blimming eggs into the cosies.

My solution?  I've designed a cute crochet cosy critter.  Instead of just having a top, it buttons shut with a cute little tail which is just simply a really small crochet ball.  Perfect for adding a bit of novelty to breakfast time or, erm, taking a boiled egg in one's packed lunch (do people do that nowadays?).  My children have little toy eggs and like to put them inside and play with the little critters =)

I used yarn that knits to a 4mm needle and a 3.5mm hook and my cosy holds a large egg, or rather conveniently, a Kinder Surprise egg.  I do work to quite a tight tension so you may find you will need to use slightly finer yarn with a smaller hook. 

You will need to know how to work doubles (US singles), increases, and dc2tog (insert hook into next hook, yarn over and draw through loop, insert hook into next stitch, yarn over and draw through loop, hook through all three loops). It's the perfect project for learning to work doubles in continuous rounds.  If you don't want the fiddly task of making the feet and tail, you can work them up really quickly by just working the top shell but your gift egg won't stay in it quite so nicely.  If you want to give a completely chocolate-free gift, you could always just make an egg shaped critter by stuffing and decreasing 6 stitches each round to close after working the top (start with (5dc, dec) then (4dc, dec) etc).


Top egg shell

Round 1: 2 chain then work 6 dc into the 2nd chain from hook, or work 6 dc into a magic ring
Round 2: 2 dc into each stitch round [12]
Round 3: (1 dc, inc) x 6 [18]
Round 4: (2 dc, inc) x 6 [24]
Round 5: Work 1 round straight without shaping
Round 6: (3 dc, inc) x 6 [30]
Rounds 7-8 : Work 2 rounds straight without shaping
Round 9: (4 dc, inc) x 6 [36]
Rounds 10-12 : Work 3 rounds straight without shaping
Round 13: (5 dc, inc) x 6 [42]
Rounds 14-15 : Work 2 rounds straight without shaping, or until work measures 5.5cm from the top of the shell
Round 16: Work straight until 5 stitches remain, ch 5
Round 17: Work straight until the 5 ch, work these stitches then slip stitch to the next stitch.  Fasten off and weave in loose ends


Base egg shell

Round 1: 2 chain then work 6 dc into the 2nd chain from hook, or work 6 dc into a magic ring
Round 2: 2 dc into each stitch round [12]
Round 3: (1 dc, inc) x 6 [18]
Round 4: (2 dc, inc) x 6 [24]
Round 5: (3 dc, inc) x 6 [30]
Rounds 6-7 : Work 2 rows straight without shaping
Round 8: (4 dc, inc) x 6 [36]
Rounds 9-10: Work 2 rows straight without shaping


Button tail

Round 1: 2 chain then work 6 dc into the 2nd chain from hook, or work 6 dc into a magic ring
Round 2: 2 dc into each stitch round [12]
This is a good point to tighten the magic ring completely and weave in the end
Round 3: Work 1 round straight without shaping
Round 4: (dc2tog) x 6 [6]
Weave through the last 6 stitches, stuff tightly with small pieces of waste yarn and pull to tighten.  Keep a yarn tail for securing to base egg shell.


Now that you've made the basic shells and tail, you can turn your cosy into whatever you wish!


Chickie Bird

Wings 
Make two

Round 1: 2 chain then work 6 dc into the 2nd chain from hook, or work 6 dc into a magic ring
Round 2: 2 dc into each stitch round [12]
This is a good point to tighten the magic ring completely and weave in the end
Rounds 3-7: Work 5 rounds straight without shaping
Round 8: (dc2tog) x 6 [6]
Keep a yarn tail for securing to the top egg shell.


Beak:

Round 1: 2 chain then work 5 dc into the 2nd chain from hook, or work 5 dc into a magic ring
Round 2: 2 dc into each stitch round [10]
Round 3: Work 1 round straight without shaping
Keep a yarn tail for securing to the top egg shell. 


Feet:
Make two

Round 1: 2 chain then work 4 dc into the 2nd chain from hook, or work 4 dc into a magic ring
Round 2: 2 dc into each stitch round [8]
Rounds 3-4: Work 2 rounds straight without shaping
Fold work in half such that there is a double layer of 3 stitches plus 2 at the ends that won't be used.  Claw 1: Slip stitch through both layers of the 'first' stitch, ch 3, 2 dc starting from 2nd ch from hook, slip stitch back into the first stitch
Claw 2: Slip stitch through both layers of the 'second' stitch, ch 4, 3 dc starting from 2nd ch from hook, slip stitch back into the first stitch
Claw 3: Slip stitch through both layers of the 'third' stitch, ch 3, 2 dc starting from 2nd ch from hook, slip stitch back into the first stitch
Fasten off and thread the tail yarn back through the magic ring for sewing onto the body


After you've made all of your pieces, sew it together and weave in loose ends:
  • Sew the button on the third row from the top of the base egg shell
  • Sew the bottom of the top egg shell to the base, securing it on the third row from the top of the base, opposite the tail
  • Fold the wings in half and sew onto the sides of the chick
  • Fold the beak in half and sew onto the front of the chick
  • Sew the feet onto the base

Bunny Rabbit

Ears:
Make two

Round 1: 2 chain then work 6 dc into the 2nd chain from hook, or work 6 dc into a magic ring
Round 2: 2 dc into each stitch round [12]
This is a good point to tighten the magic ring completely and weave in the end
Rounds 3-9: Work 7 rounds straight without shaping
Round 10: (dc2tog) x 6 [6]
Keep a yarn tail for securing to the top egg shell.


Feet:
Make two

Round 1: 2 chain then work 4 dc into the 2nd chain from hook, or work 4 dc into a magic ring
Round 2: 2 dc into each stitch round [8]
Rounds 3-5: Work 3 rounds straight without shaping
Keep a yarn tail for securing to the bottom egg shell.

Sunday, 26 February 2012

Crochet - working doubles in continuous rounds

I taught myself to knit as a teenager (I used to sneak off and max out my library card with crafting books!) and almost anyone who knits would agree that knitting flat on two straight needles is so much easier than knitting in-the-round, either using DPNs or the magic loop method.  When I first tried to crochet almost ten years ago, it was a rather brief affair because I mistakenly assumed that working in rows would be easier than in continuous rounds.  Boy was I wrong - I lost count of my stitches, got all confused trying to remember how to work a double, half-treble, treble, long treble (because the books teach you stitch after stitch after stitch, of course I assumed I'd have to master them all before I could make anything), and I did not respect or even understand the turning chain.
The Japanese art of amigurumi has become very popular recently and largely relies on working double crochet in continuous rounds....  You do not need to be a crochet master in order to make beautiful toys - all you need to know is how to make a chain, double crochet, increase and decrease.

This 'tutorial' works through starting, increasing 6 stitches evenly on each round, working straight without shaping and decreasing 6 stitches evenly on each round.  Tips are given on using stitch markers and also for shaping and round counting 'by eye'.


Keeping track of your stitches

When you first start out, you will definitely need to use stitch markers.  You can buy split ring markers or use small safety pins.  I prefer to use a small length of contrast yarn because I find split ring markers often fall out making you lose your place.  The nice thing about contrast yarn is that you can continue working without moving it every round and you can keep trailing it through your work and pull it out when you're done with it.  One of the most useful tools is to simply count - most decent patterns will state the number of stitches you should have at then end of each round.  Many people obsess over moving their stitch markers at the end of every round, but it is so much easier to learn how to work without them (my stitch markers constantly fell out when I first started out in crochet and I just ended up unravelling my work because I'd lost track of where I'd got to!!!) because if you understand your work, it's so much easier to figure out which point you've reached in your pattern.


Starting

During my time doing crochet, I have come across a two methods of starting working crochet in-the-round.  The first is simply to work two chain and then work the required number of stitches into the 2nd chain from the hook.  I prefer the magic circle method.  Is is not appropriate for all types of yarn, in particular bumpy or lumpy yarns, for which it is best to use the 2-chain method.


The Magic Circle

The magic circle takes a little bit of practise, but once you've got it cracked, it s quite simple.  The right-handed instructions for working double crochets into a magic circle assume prior knowledge of how to hold the hook and the working yarn, working chains, and working double crochets (US singles)


Make a loop around the index and middle  fingers of your left hand such that the working yarn lies on the top of the loop and is crossed such that it is closest to your palm.
 

Pass hook under the strand of yarn closest to the tip of your index finger, and pull the working yarn under to form a loop

You now have one loop on your hook, but it is not yet secured.  The next steps will tie a loose knot

Pass the magic circle to your right hand and hold on to it while you yarn over and pull the yarn through

Pull to close the knot

You will now have a magic circle with a loop attached to it with a sliding knot.  If you pull the tail end of your yarn you can loosen and tighten the magic circle, but don't just yet.

Hold the magic circle open with the free fingers on each hand and work into the circle, making sure to hold the tail yarn together with the left-hand-side of the circle (the two strands can be seen being held under the left thumb) because it will be wrapped under the double crochets as you work leftwards.

Pass the hook into the circle, yarn over

You will have two loops on your hook

Yarn over and draw yarn through both loops on hook.  You will have worked 1 dc into your magic circle

Continue working doubles until the number required for the pattern has been worked.  The photo shows 6dc, as is required for many projects working in the round

Carefully pull the tail yarn to close the magic circle

You are now ready to start working in the round.  It is of course, not necessary to work doubles into the magic circle - trebles or indeed any other stitch can be worked for the first round, just remember to work the correct length chain at the beginning of the round.


Round 2

Round 2 is often a round with two dc worked in each stitch round resulting in double the number of stitches by the end of the round.  Make sure that the hook passes under both loops the stitch

After working the first dc, place your stitch marker to mark the beginning of your round.  I use a piece of contrast yarn


This photo shows the end of the second round.  2dc have been worked into each stitch, there are 12 stitches, and the next stitch has the stitch marker threaded onto it


Managing increase rounds

An increase is worked by simply working two stitches into the following stitch thus increasing the stitch count by one.

If contrast yarn is chosen as the 'stitch marker', there is no need to keep moving it after each round.  It can either be left at the beginning of the work, or woven through the work.  Much of working in the round to make toys involves increasing 6 stitches evenly on every round until the work has reached the required number of stitches.  As a result, an increase stitch is worked into the second stitch from an increase stitch from the previous round until the required number of stitches is reached.  Although you will no doubt count stitches between stitches when you first start out, it really is worth working out how to judge it by eye.  I have highlighted the second stitch of some of the increases with a green arrow.


I prefer not to use stitch markers and simply work an increase into the second stitch of every increase stitch until I reach the required number of stitches.  Take a look at the picture below; work (5 dc, inc) x 6 on the next round.  There are 36 stitches, so 6 rounds have been worked.


Shaping after increasing followed by a straight section

Once the work has reached the required number of stitches, work straight without shaping.  You will probably have noticed by now that crochet worked in continuous rounds has a slight kilter to it - right-handed crochet skews slightly to the right and left-handed crochet skews slightly to the left.  This makes it slightly more difficult to count the number of rounds worked.  I have highlighted the photo with a yellow line to show the first stitch across subsequent rounds and a green arrow to indicate the last increase stitch before the straight section.  With the contrast yarn marking the beginning of the round, 10 straight rounds have been worked since the last increase round + 7 stitches.

As we've already seen, if increasing evenly around on all increase rounds, the increase stitch is made into the second stitch of the previous increase stitch.  I have highlighted the second stitch of the last increase stitch.  If an increase round is to be worked, work 2 dc then inc.  If a decrease round is to be worked, work 1 dc then start the decrease in the next stitch.


You may prefer to weave your contrast yarn through your work:


Decreasing

There are two ways of decreasing when working doubles: dc2tog (double crochet 2 together) and invDec (invisible decrease).  Invisible decrease isn't as invisble as the name suggests, but is it a little less visible than dc2tog.  Try out both methods of decreasing before you decide which method you like best.  Even if you prefer one method, the other method may be better for different yarns.


dc2tog (double crochet 2 together)

Insert the hook under the next stitch, yarn over and draw up loop (2 loops on hook), insert hook into the next stitch, yarn over and draw up loop (3 loops on hook).   Yarn over and draw hook through all 3 loops on hook.

Much like increasing evenly on every round, it is easy to decrease evenly on each round without markers.  The green arrow highlights the decrease stitch.  The second stitch in the dc2tog is worked into the top of the dc2tog from the previous round.  If decreasing evenly on all subsequent rounds, work 2dc then start the dc2tog.


invDec (invisible decrease)

Pass hook under front loop only of next stitch (2 loops on hook)


Pass hook under front loop only of another stitch (3 loops on hook).  Yarn over, draw hook through 2 loops then yarn over and draw hook through final 2 loops.


The grean arrow below indicates an invDec on the round below.  The second stitch in the invDec is worked into the top of the invDec from the previous round.  If decreasing evenly on all subsequent rounds, work 2dc then start the invDec.


The picture below shows two pieces of work in which 6 stitches were decreased evenly across every round to close.  The one on the left was worked using dc2tog, and the one on the left using invDec.


Follow me on Facebook and see what I'm up to at the moment =)

Wednesday, 15 February 2012

A demure mermaid dress =)

Disney's Little Mermaid is beautiful but when it comes to giving the doll to a 3 year old who has a 20 month old brother, the scallop shell bikini keeps falling off.  In fact, I have no idea where it currently is.  One of my daughter's storybooks features a Little Mermaid whose fish tail continues up over her boobs like a strapless dress, which gave me an idea for a project to use up some green yarn I found.....

 
I have worked hard creating my original patterns and am happy for them to be used for free.  Please do not sell the patterns.  If you do sell the end products please state clearly that they were made using my design, and that the pattern came from www.craftymamasanchez.blogspot.com.  Thanks, and enjoy!
 
You will need:
  • Yarn that knits to 3mm needles
  • 3mm crochet hook
  • 2.5mm crochet hook
  • Yarn needle
  • Stitch marker

Techniques used (UK terminology):
  • ch: chain
  • slst: slip stitch 
  • yo: yarn over
  • dc: double crochet (US sc, single crochet).  Insert hook, yo, draw hook through both loops
  • htc: half treble crochet (US hdc, half double crochet).  Yarn round hook, insert hook, yo, draw hook through all three loops
  • tc: treble crochet (US dc, double crochet).  Yarn round hook, insert hook, yo, draw hook through two loops, yo, draw hook through two remaining loops
  • inc: work 2 dc into next stitch
  • dc2tog: double crochet 2 together. Insert hook in next stitch, yo and pull up loop (2 loops on hook), insert hook in next stitch, yarn over and pull up loop (3 loops on hook), yarn over and draw through all 3 loops on hook
  • tc3tog: treble crochet 3 together.  Yarn round hook, insert hook in next stitch, yo, draw hook through 2 loops (2 loops on hook), yarn round hook, insert hook in next stitch, yo, draw hook through 2 loops (3 loops on hook), yarn round hook, insert hook in next stitch, yo, draw hook through 2 loops (4 loops on hook), yo and draw hook through all 4 loops
  • working in continuous rounds
  • working rounds by joining

Tail

The tail is worked in crocodile stitch to give the appearance of scales.  It is not as complicated as it looks - all you need is to be able to make chains and trebles.  It is far easier to do than explain, so just pick up your yarn and hook and give it a go.  The tail is worked in the round, and crocodile stitch is even easier when worked in the round!!!

Before you start, it is worth understanding the principles of crocodile stitch.  Each row of scales is formed by working a row of 'skeletons', formed from a pair of trebles separated by a chain, from right to left (for right-handers) which can be charted as below:

The scales are then built by fleshing out the skeletons by turning the work 90 degrees in order to work 5 trebles on the left-most treble (let's call it leg 1), a chain, then turning the work 180 degrees to work 5 trebles on the next treble of the skeleton pair (let's call it leg 2).  The treble of the first scale of each row/round is formed by working 3 ch.  Scales are worked from left to right (for a right-hander), on alternate skeleton pairs.  In order to achieve an interlocking effect, scales are worked such that they alternate on subsequent rows.

When working in the round, an even number of skeletons is worked that is double the number of desired scales.

With a 3mm hook, make 6 ch and join with a slip stitch (don't worry about twisting the chain)
Skeleton round 1:  Working into the circles, ch 3 to form the first tc, 1 tc, ch 1, (2 tc, ch 1) x 7.  Slst to top of ch 3 to join [8 skeletons]


Scale round 1: The hook will now be in the top of a skeleton.  Work the first scale by working 3 ch to form the first tc then 4 tc onto leg 1, ch 1, 5 tc onto leg 2 (refer to chart).  Work 4 scales round, on alternate skeletons.  Slst to corner top of 3 ch to join round.  The scales will 'point downwards' on the work.


Skeleton round 2: (Working right to left), ch 3 to form the first tc, tc between two scales, making sure to work between the pair of tc from the skeleton underneath, ch 1, 2 tc into middle of scale, ch 1.  Continue in this manner to the end of the round, slst to top of ch 3 to join [8 skeletons].  When working a skeleton between scales, always make sure to work between the skeleton.
Scale round 2:  Because of working in the round, in order to create interlocking scales, the skeleton at the beginning of a round will always be worked with scales, and the next one skipped.

Work 6 rounds of 4 scales per round

Increase round:   Ch 3 to form the first tc, tc between two scales.  Ch 1.  Work 2 tc behind the next scale in the ch 1 between skeletons under the scale, ch 1, work 2 tc behind the same scale in the ch 1 between skeletons under the scale, ch 1.  Continue in this way round until there are 12 skeletons, one between each scale and two behind each scale.  It's a confusing round, but the the only of its type in the project (thank goodness!)

Continue working 6 scales per round until the tail measures 18 cm (or just try it on the doll for size and stop when it reaches her waist). 


Dress bodice

The bodice is worked in trebles to give it a bit of stretch.  Slst to join to the first stitch of the round.  Ch 2 to give height (not counted as a stitch) then work the first tc of the round in the same stitch as the slst.


Round 1:  With scales facing, 36 dc round, working through the scales and the skeletons in order to join them.  This is easily done by working 1 dc between scales, 2 dc on the right half of each scale, 1 dc in the middle of each scale and 2 dc on the left half of each scale.  Slst to first stitch of round, ch 2
Round 2:  Change to 2.5mm hook.  36 tc round (see above). Slst to first stitch of round, ch 2
Round 3:  2 tc, tc3tog, (3tc, tc3tog) x 5, tc. Slst to first stitch of round, ch 2 [24]
Round 4-end: 24 tc round

Continue until work measures 24 cm (or until it covers the doll's boobs)


Straps:

Work 5cm chain (I needed 15 ch), slst to 9th stitch.  htc, 6tc, htc, slst, work 5 cm chain, slst to first stitch.  Cut yarn and sew securely, weaving in loose ends.


Tail fins 
Made using continuous rounds.  Do not join or turn work.
Make two

Round 1:  Ch 2, 6 dc into 2nd chain on hook 
Round 2:  2 dc into each stitch round [12]
Rounds 3-5:  Work without shaping for 3 rounds
Round 6:  (1 dc, inc1) x 6 [18]
Rounds 7-9: Work without shaping for 3 rounds
Round 10:  (2 dc, inc1) x 6 [24]
Rounds 11-14: Work without shaping for 4 rounds
Rounds 15-16: 6 dc, 2 htc, 8 tc, 2 htc, 6 dc
Rounds 17-19:  Work without shaping for 3 rounds
Round 20:  (2 dc, dc2tog) x 6 [18]
Rounds 21-22: Work without shaping for 2 rounds
Round 23:  (1 dc, dc2tog) x 6 [12]
Rounds 24-25: Work without shaping for 2 rounds
Round 26: dc2tog x 6 [6]

Sew tail fins to bottom of tail and weave in loose ends

Follow me on Facebook and see what I'm up to at the moment =)

Saturday, 4 February 2012

Every boy wants a lion.... because boys just love to roar!

When I found a ball of yellow cotton, I knew at once that I would be making a lion because the boy kept running off with Nana Bunny Rabbit and Papa Sanchez was NOT happy about his little man playing with a pink floppy bunny and kept nagging me to make a 'manly' toy.  After seeing a photo of Leone Tremblay on the Hobby Uncinetto blog (there are so many amazing patterns on that site!), I just had to make a lion with cute cheek pouches too.


Whilst loving crochet, I am so lazy when it comes to stitching the body parts together, so I wanted to try a technique of attaching as many pieces as possible by holding them at the front of the work and crocheting through both them and the working piece.  In order to follow this pattern you will have to start by making the tail, one leg and then continue from the second leg up the body and through to the top of the head.

As this is a toy, the thickness of yarn and tension are not important. Just remember that the chunkier the yarn, the bigger the finished size of the toy.  Make sure to use a hook size that will give you a tight finish to ensure the stuffing doesn't show through stitches.  I used 100g of a yellow cotton that knits to 4mm needles, and a 3.5mm crochet hook and my lion measures 33.5cm from head to foot.  I used 12mm safety eyes.

I have worked hard creating my original patterns and am happy for them to be used for free.  Please do not sell the patterns.  If you do sell the end products please state clearly that they were made using my design, and that the pattern came from www.craftymamasanchez.blogspot.com.  Thanks, and enjoy! 

What you'll need:
  • Yarns in yellow, brown, black and cream
  • Crochet hook
  • Yarn needle
  • Polyester toy stuffing
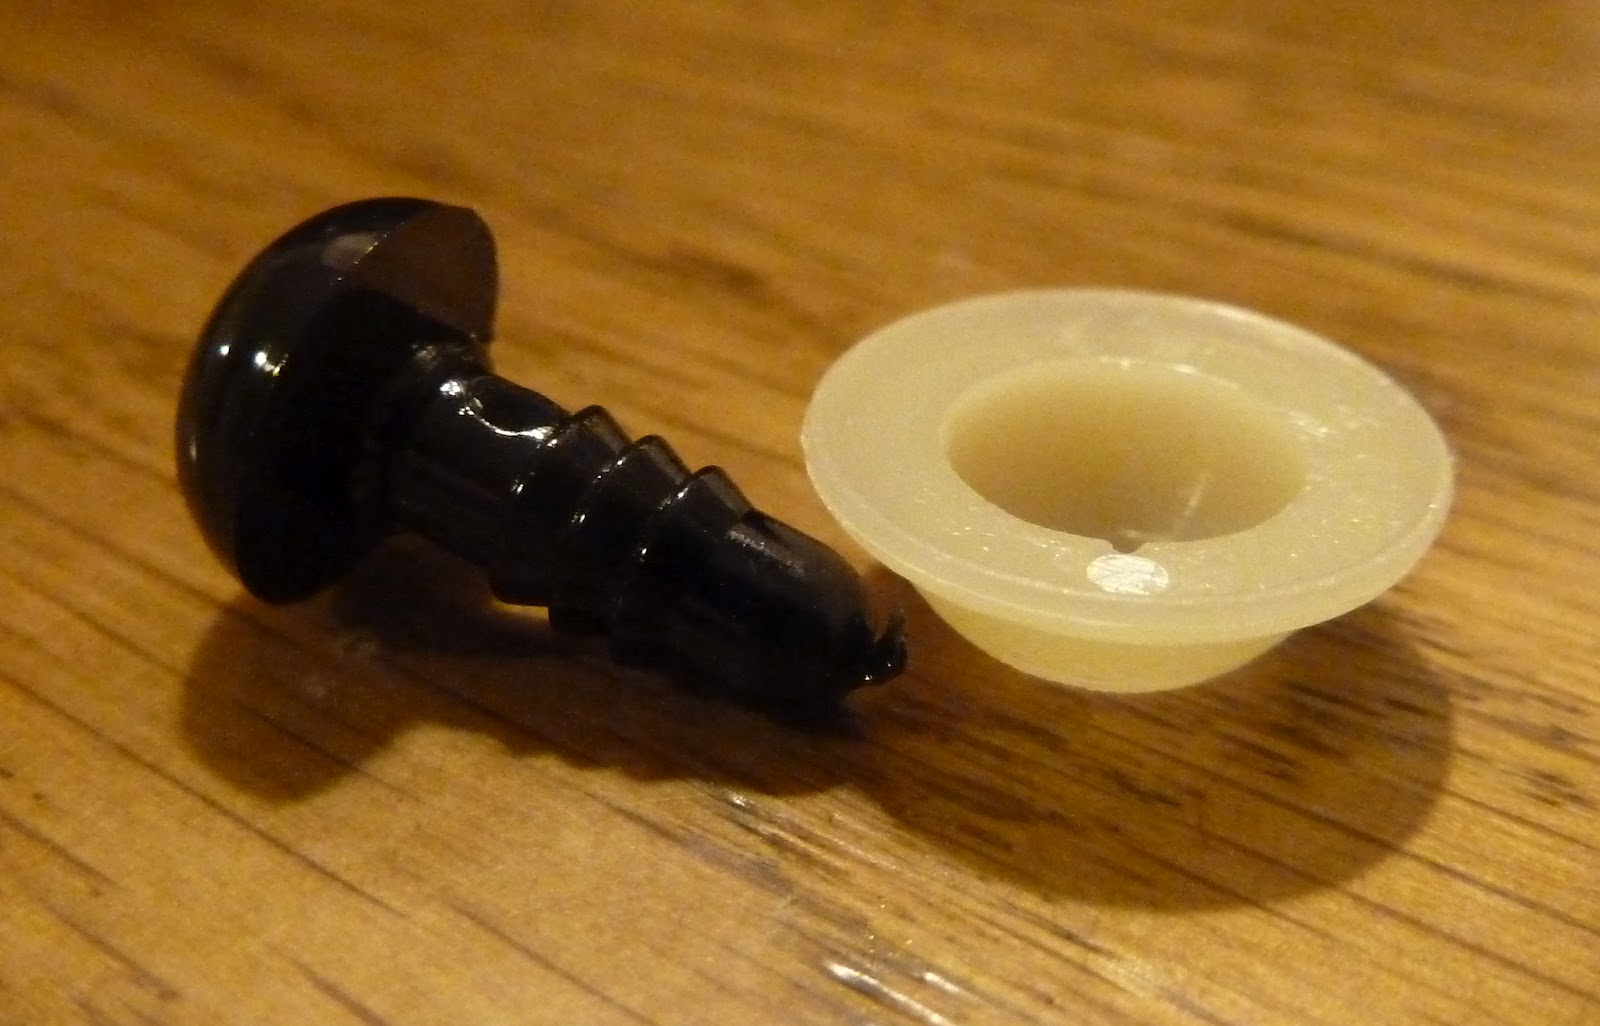
  • 2 safety eyes (optional).  These plastic eyes that can be bought in a number of sizes really add to the professional finish of your toy.  Make sure to insert them securely.  If you are giving the toy to a baby, you may prefer to embroider the eyes.


Techniques used (UK terminology):
  • ch: chain
  • dc: double crochet (US single crochet)
  • slst: slip stitch
  • inc: work 2 dc into next stitch
  • dec.  You can use dc2tog, double crochet 2 together: insert hook in next stitch, yarn over and pull up loop (2 loops on hook), insert hook in next stitch, yarn over and pull up loop (3 loops on hook), yarn over and draw through all 3 loops on hook.  If you prefer to use invDec, invisible decrease: then hook through front loop only of next two stitches, yarn over, draw through loop (3loops on hook), yarn over and draw through 2 loops (2 loops on hook), yarn over and draw through both loops on hook
  • front loop only
  • working in continuous rounds.  Unless otherwise stated, all parts of toy are worked in continuous rounds
  • working in rows
  • working rounds by joining

Tail

Round 1:  With brown, ch 2 and work 4 dc into 2nd chain from hook (or work 4 dc into a magic circle) [4]
Round 2:  (1 dc, inc) x 2 [6]
Rounds 3-4:  Work 2 rounds without shaping [6]
Round 5:  (2 dc, inc) x 2 [8]
Round 6:  (2 dc, dec) x 2 [6]
Change to yellow and work 25 rows without shaping.  This will give a tail reaching halfway down the foot (the white part of the leg).  If you prefer, work the first leg, then work the tail the length you want it against the leg and add 5 rows.


Legs

Make two, without breaking the yarn after completing the second

Round 1:  With cream, ch 2 and work 8 dc into 2nd chain from hook (or work 8 dc into a magic circle) [8]
Round 2:  2 dc into each st round [16]
Round 3:  (1 dc, inc) x 8 [24]
Round 4:  (2 dc, inc) x 8 [32]
Round 5:  Work without shaping [32]
Round 6:  (7 dc, inc) x 4 [36]
Rounds 7-10:  Work 4 rounds without shaping [36]
Round 11:  (7 dc, dec) x 4 [32]
Round 12:  (6 dc, dec) x 4 [28]
Round 13:  (5 dc, dec) x 4 [24]

Change to yellow

Rounds 14-21  Work 8 rounds without shaping [24]
Round 22:  (10 dc, dec) x 2 [22]
Rounds 23-30:  Work 8 rounds without shaping [22]
Round 31:  (9 dc, dec) x 2 [20]
Rounds 32-39:  Work 8 rounds without shaping [20]
Round 40:  (8 dc, dec) x 2 [18] Rounds 41-46:  Work 6 rounds without shaping [18]


Body

Stuff both legs, fold working leg in half and crochet 8 stitches through, chain 2 then fold second leg in half and crochet 8 stitches through.  Now, resume working in the round:

Round 1:  Work 18 stitches through front loops only.  Turn work so that the unworked back loops are at the front of the work and work these 18 stitches.  [36]
Round 2:  (5 dc, inc) x 6 [42]
Round 3:  (6 dc, inc) x 6 [48]
Rounds 4-6:  Work 3 rounds without shaping [48]

Attach the tail in the next row, between the legs.  Fold the tail in half and hold at front of work.  Work 2 stitches through 2 layers of tail and 1 layer of the body
 
Round 7:  (7 dc, inc) x 6 [54]
Rounds 8-12:  Work 5 rounds without shaping [54]
Round 13:  (7 dc, dec) x 6 [48]
Rounds 14-17:  Work 4 rounds without shaping [48]
Round 18:  (6 dc, dec) x 6 [42]
Rounds 19-22:  Work 4 rounds without shaping [42]
Round 23:  (5 dc, dec) x 6 [36]
Rounds 24-25:  Work 2 rounds without shaping [36]
Round 26:  (4 dc, dec) x 6 [30]
Rounds 27:  Work without shaping [30]
Round 28:  (3 dc, dec) x 6 [24]
Rounds 29:  Work without shaping [24]
Round 30:  (2 dc, dec) x 6 [18]

Start stuffing the body.  Now start increasing for the head

Round 31:  (2 dc, inc) x 6 [24]
Round 32:  (3 dc, inc) x 6 [30]
Round 33:  (4 dc, inc) x 6 [36]
Round 34:  Work without shaping [36]
Round 35:  (5 dc, inc) x 6 [42]
Round 36:  Work without shaping [42]
Round 37:  (6 dc, inc) x 6 [48]
Rounds 38-47:  Work 10 rounds without shaping [48]

If using safety eyes, insert between rows 44 and 45, with 10 stitches between them.  Start stuffing and continue as you go along

Round 48:  (6 dc, dec) x 6 [42]
Round 49:  (5 dc, dec) x 6 [36]
Round 50:  (4 dc, dec) x 6 [30]
Round 51:  (3 dc, dec) x 6 [24]
Round 52:  (2 dc, dec) x 6 [18]
Round 53:  (1 dc, dec) x 6 [12]

Round 54:  dec x 6 [6]

Draw yarn through last 6 stitches, secure and weave in loose ends.  Don't worry about being too neat - any little bump can be hidden under the mane.


Arms

Make two

Round 1:  With cream, ch 2 and work 8 dc into 2nd chain from hook (or work 8 dc into a magic circle) [8]
Round 2:  2 dc into each st round [16]
Round 3:  (1 dc, inc) x 8 [24]
Round 4:  (5 dc, inc) x 4 [28]
Round 5:  (6 dc, inc) x 4 [32]
Rounds 6-8:  Work 3 rows without shaping [32]
Round 9:  (2 dc, dec) x 8 [24]
Round 10:  Work without shaping [24]
Round 11:  (4 dc, dec) x 4 [20]

Change to yellow

Rounds 12-18: Work 7 rows without shaping [20]
Round 19:  (8 dc, dec) x 2 [18]
Rounds 20-26:  Work without shaping for 7 rows [18]
Round 27:  (7 dc, dec) x 2 [16]
Rounds 28-34:  Work without shaping for 7 rows [16]
Round 35:  (6 dc, dec) x 2 [14]
Rounds 36-37:  Work without shaping for 2 rows [14]

Stuff, fold in half and crochet 6 stitches through both sides.  Sew to either side of neck.


Nose

The nose is worked in rounds, but not continuous rounds as for the rest of the toy.  At the end of a round, join to the first stitch of the round with a slip stitch, ch1 then start the next round in the top of the slip stitch

Round 1:  With black, ch 2 and work 8 dc into 2nd chain from hook (or work 8 dc into a magic circle), join, ch1 [8]
Round 2:  3 dc in first stitch,  dc in next 2 stitches,  3 dc in each of next 2 stitches,  dc in next 2 stitches,  3 dc in last stitch,  join, ch1 [16]
Round 3:  3 dc in first stitch,  dc in next 6 stitches,  3 dc in each of next 2 stitches,  dc in next 6 stitches,  3 dc in last stitch, join and fasten off [24]


Cheeks

Make two 

Round 1:  With cream, ch 2 and work 6 dc into 2nd chain from hook (or work 6 dc into a magic circle) [6]
Round 2:  2 dc into each st round [12]
Round 3:  (1 dc, inc) x 6 [18]
Round 4:  (2 dc, inc) x 6 [24]
Round 5: Work without shaping
 

Ears

Each ear is made by making a cream semi-circle, then a yellow semi-circle which is joined to the cream one by placing the cream one behind it and working the final row through both pieces.  Semi-circles are worked in rows, not continuous rounds.  Do not count the turning chain as a stitch.

Make two:
Row 1:  With cream ch2, work 3 dc into 2nd chain from hook.  Ch1, turn [3]
Row 2:  2 dc in each stitch across. Ch1, turn [6]
Row 3:  (1 dc, inc) x 3. Ch1, turn [9]


Make two:
Row 1:  With yellow ch2, work 3 dc into 2nd chain from hook.  Ch1, turn [3]
Row 2:  2 dc in each stitch across. Ch1, turn [6]
Row 3:  (1 dc, inc) x 3. Ch1, turn [9]

Row 4: Working with a cream semi-circle behind, work 9 dc across through both the yellow and the cream pieces, then rotate and work 6 stitches along to close the ear completely


Mane

Make a chain long enough to fit around the head, under the chin and behind the ears, join to make a loop being careful not to twist stitches.  Work two rounds of loop stitch.


Finishing

Using the picture as a guide first sew on the nose then the cheeks, stuffing as you go.  Sew on the ears, then the mane, tucking it behind the ears.