Wednesday, 29 February 2012

That's MY vino!!!

 
We ladies all love wine club, and whether we dress it up in the guise of something more intellectual like 'book club' or just brazenly invite everyone on the neighbourhood around for wine, one thing's for sure: it's difficult to remember who was drinking from which glass!!!  Some people use charms, but since making my mug hugger coasters, the clunk of my wine glass against the table while I'm watching TV is pretty annoying.  So I've come up with some wine coasters =)

The coasters are worked in two main sections: the base is worked in doubles (US singles) in continuous rounds, the top with the hole is worked in trebles (US doubles) in joined rounds.  If you've not worked in continuous rounds before, have a look at Crochet - working doubles in continuous rounds.  You will also need to know how to work a tc2tog (treble crochet 2 together: yo, insert hook into next st, yo draw hook through 2 loops, yo insert hook into next stitch, yo draw through hook through 2 loops, yo draw hook through remaining 3 loops)

I used various yarns that knit to a 4mm needle and a 4mm hook.  I work to quite a tight tension, so you may find you will need to use yarn that knits to a 3.5mm needle and a 3.5mm hook to achieve a circle of 8cm after 10 rows.  Don't use a hook that is too small otherwise your coaster may not stretch over the base.

I have worked hard creating my original patterns and am happy for them to be used for free.  Please do not sell the patterns.  If you do sell the end products please state clearly that they were made using my design, and that the pattern came from www.craftymamasanchez.blogspot.com.  Thanks, and enjoy! 


Base:

Round 1: 2 chain then work 6 dc into the 2nd chain from hook, or work 6 dc into a magic ring
Round 2: 2 dc into each stitch round [12]
Round 3: (1 dc, inc) x 6 [18]
Round 4: (2 dc, inc) x 6 [24]
Round 5: (3 dc, inc) x 6 [30]

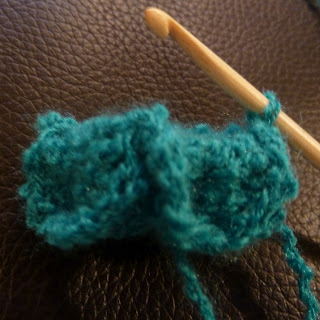
Continue increasing 6 stitches per round in this manner until your work is just bigger than the base of your wine glass. I needed 10 rounds [60 stitches]
Work one round of dc without increasing until the last stitch, then sl st into last stitch.

Mine worked up at just over 8cm and fit most regular wine glasses.


Top:
 
This section is worked in trebles in rounds because it needs to have stretch in it.

Turn the work over because you will be working inwards towards the hole decreasing as you go, and you'll want the right side of the base facing upwards through the hole.

Round 1:  Working through back loop only, ch 2, tc into the same stitch as the sl st, tc2tog, (tc, tc2tog) to end of round. Sl st to top of first stitch of round. [40]
Round 2: Ch 2, start from the stitch next to the sl st (tc, tc2tog) to end of round. Sl st to top of first stitch of round 1 and finish, weaving in loose ends. [25]


Make it your own

  • Why not make different coloured flowers?  Attach your yarn to one of the unused loops on the edge.  If you ended with 60 stitches, you could add 15 petals (slst, sk1, 5tr in next st, sk1) x 15,  or 10 petals (slst, sk2, 7dtr in next st, sk2) x 10
  • For those of you who want something a bit more subtle, with just a splash of colour (or for those whose hubby just isn't going to use a pink floral wine coaster!!), why not make a coloured base with a black top?  I changed to black on the last increase round to ensure a neat look from the side.

Follow me on Facebook and see what I'm up to at the moment =)


Say no to 0870!!!

I know this have nothing to do with crafting but it's something I feel quite passionately about: companies giving out non-local numbers!!!  There's a website Say No To 0870, that allows you to input a UK call centre number and will return a local number if they have one on their database.

I remember someone circulating it at work but I didn't really pay much attention to it until I racked up almost £50 worth of call centre calls in one month to one company whilst trying to set up a TV and internet package (I won't name and shame them, but why don't they offer calls to customers for free??!!)

Tuesday, 28 February 2012

A reversible dress.... Because even toddlers like a bit of choice ;-)

I've always approached knitted and crochet garments with an 'all or nothing' approach but having a whole box of single balls of unlabelled yarn and not being brave enough to give Fair Isle a go, I decided to sew a dress and add a crochet yoke.  It was a process of trial and error at first, getting a strip with the correct degree of curvature, but I got there in the end.  And, because crochet worked in rows doesn't really have a right or wrong side, I gave the yoke a lip because I thought a reversible dress would be a great idea (because girls love choice, and you never know when turning it 'inside-out' might have to be an option!).

After I finished crocheting the yoke, I carried the yoke around for ages hoping I might happen upon a sewing shop at some point.  I gave up in the end and went to The Cotton Patch.  I figured that a shop specialising in quilting would have a huge collection of complementing prints.  They have a beautiful array of fabrics and I could have browsed forever but I opted for a couple of Amy Butler fabrics because they both contained olive accents.
I've never been one to follow sewing patterns; I just grab my tape measure, wrap it around my subject and hope for the best.  If you've got a 2-3 year old, you can just follow my pattern directly.  If not, hopefully my 'pattern' will help you.

If I do say so myself, it has turned out really nicely and I am quite excited about making a few more in different colour combinations....  In fact, I'm tempted to make myself a matching top =)

I have worked hard creating my original patterns and am happy for them to be used for free.  Please do not sell the patterns.  If you do sell the end products please state clearly that they were made using my design, and that the pattern came from www.craftymamasanchez.blogspot.com.  Thanks, and enjoy!

What you will need:
The amount yarn, fabric and buttons will vary depending on the size of child and hence garment.  I made mine to fit a child of height 86cm/34" and chest circumference 50cm/20" and found that 50g of yarn, and 0.5m x 1m of each fabric was ample.
  • 50-100g yarn that knits to a 5mm needle
  • 5mm crochet hook 
  • complementing fabrics
  • sewing machine
  • threads in coordinating colours
  • buttons and/or poppers.  Buy twice the number of buttons that you have button holes (don't forget the 'one on the yoke'!!)
  • tape measure
  • scissors or rotary cutter and cutting mat
  • hand sewing needle
  • yarn needle
Taking measurements
Below is a simple sketch of the measurements I took and how I translated them to the sizing of the garment.  Because of the style of the dress, the only important measurements are the chest circumference and length.  Although I prefer metric, my sewing machine guides are all imperial so I have decided to not fight it and just take all my measurements in inches. Finding that my daughter has a chest circumference of 20", I halved it for the flat measurement of the front of the dress then added 2" to allow for room.  As the size at the hem is not too important, I simply doubled the flat chest measurement to give 24".

Crochet yoke:
I worked the yoke in trebles (US doubles) because they are of a sufficient height that there is no need to work buttonholes.  On the last row, I worked trebles across using the front loops only then flipped the piece and worked trebles to the end using the unworked loops that are, after flipping the work, front loops. It feels rather awkward working the first few stitches after the flipping the work because you will be working from the bottom of the loop up (you'll see what I mean when you get there).  This gave me a lip at the bottom in which I could sew in the fabric in order to hide loose ends.

A lot of people work a turning chain of 3 when working trebles, then work their first treble of the next row into the second treble of the previous row, and their last treble into the 3rd chain of the turning chain from the previous row.  I find this method messy and only use a turning chain of 2 and work into the top of every stitch.

Take your 3/4 of your chest circumference measurement and work a chain that is a multiple of 4, plus 5.  For example working to a chest measurement of 20", I worked a chain of 73 which was approximately 15" long.  After working the first row, your work should have stretched a bit.

Row 1:  Treble in the 3rd chain from hook, treble to end.  Chain 2 and turn

Row 2:  Work 4 trebles. Then work 2 trebles in the next stitch then 1 treble in the next 3 stitches until 4 stitches remain.  Work 2 trebles in the next stitch then 1 treble in each stitch to end.  Chain 2 and turn.  (I ended up with 89 stitches)

Rows 3 & 4: Work straight with a turning chain of 2

Row 5:  Work 4 trebles. Then work 2 trebles in the next stitch then 1 treble in the next 4 stitches until 5 stitches remain. Work 2 trebles in the next stitch then 1 treble in each stitch to end. Chain 2 and turn.  (I ended up with 105 stitches)

Row 6:  Treble to end working in front loops only.  Turn work and treble to end working in back loops only.

These six rows make a yoke roughly 2.5" thick.  If you are making a dress for a larger girl, you may wish to add a few extra rows for a thicker yoke.  The yoke will have an open lip at the longer side of its curve.  I allowed 6" of the stitches from the middle of the yoke for the front neck and 3" from either side for the back neck pieces (29 stitches and 14 stitches respectively).  I then sewed along the remaining stitches with tail yarn to seal the lips across the arm holes.


Cutting the fabric

The cutting of fabric for this project does not need to be precise because it is a very floaty roomy dress.  If the length of your fabric is greater than 3x the measurement you have allowed for the chest, you will be able to cut your fabric as below.   I cut my pieces from a 20" wide piece of fabric so that the front piece was 12" wide at the neck and 24" wide at the hem.

Lay your two fabrics, one on top of the other.   Add your neck and hem measurements together and divide by two.  I calculated (12" + 24")/ 2 = 18".  Fold your fabrics, making sure they are still together, allowing at least this measurement.  The fold is the middle fold of the front.


Mark 12" from the fold on one end of the fabric, and 6" from the fold on the other.  

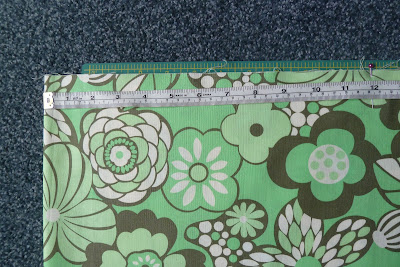
I don't have a ruler long enough, so just stretched my tape measure from one pin to the other as a guide, and cut a diagonal line.  I cut a perpendicular line to trim.

After trimming any excess fabric from where the shop cut them slightly differently, I layed all the pieces in a stack and trimmed a curve from the diagonal.

With minimal cutting, I had cut all the pieces I needed for my project =)

Referring back to my chart, I allowed 4.25" on the diagonal from the neck for the arm holes.

Grouping the fabrics, I placed them right-side to right-side and sewed along the diagonal, leaving the 4.25" armhole allowance.  I then sewed the two pieces together along the perpendicular edges, then along the curved hem.

After turning the work right-side out, I sewed the most fiddly part of the arm holes.  I didn't do any special shaping - the armholes split into a 'V' when the dress is put on.

I don't have a gathering foot for my sewing machine, so simply sewed a straight line across each of the three pieces of the the neck using the longest stitch setting.  Using the lip openings on the yoke as a guide, I pulled on the top thread to gather the fabric and ruffled and adjusted it until the piece fit into the corresponding lip.  I then 'set' the gathering by sewing over it with a zigzag stitch.

I hand stitched the gathered neck pieces into their corresponding yoke 'lips' remembering to be very neat because both sides will be seen!! I bought my buttons for this project before I had the idea of making it reversible and only bought 5.  Had I thought it out, I'd have bought 10 and sewn a button on each side of the fabric so as to have button holes on both sides of the dress.  To impatient to wait until I could buy more buttons, I used some poppers I found.  I then sewed a button on each side of the top corner of the yoke.


Being a typical girl that likes pink, I thought my daughter would hate the fabrics I picked out, but she loves her dress calling the side with blue flowers her 'Tinker Bell' side and the other her 'Princess Fiona' [from Shrek] side.  Now I just need to make sure she eats really messily when she's wearing it in public so I get an excuse to show of both sides....

Follow me on Facebook and see what I'm up to at the moment =) 


Sunday, 26 February 2012

Crochet - working doubles in continuous rounds

I taught myself to knit as a teenager (I used to sneak off and max out my library card with crafting books!) and almost anyone who knits would agree that knitting flat on two straight needles is so much easier than knitting in-the-round, either using DPNs or the magic loop method.  When I first tried to crochet almost ten years ago, it was a rather brief affair because I mistakenly assumed that working in rows would be easier than in continuous rounds.  Boy was I wrong - I lost count of my stitches, got all confused trying to remember how to work a double, half-treble, treble, long treble (because the books teach you stitch after stitch after stitch, of course I assumed I'd have to master them all before I could make anything), and I did not respect or even understand the turning chain.
The Japanese art of amigurumi has become very popular recently and largely relies on working double crochet in continuous rounds....  You do not need to be a crochet master in order to make beautiful toys - all you need to know is how to make a chain, double crochet, increase and decrease.

This 'tutorial' works through starting, increasing 6 stitches evenly on each round, working straight without shaping and decreasing 6 stitches evenly on each round.  Tips are given on using stitch markers and also for shaping and round counting 'by eye'.


Keeping track of your stitches

When you first start out, you will definitely need to use stitch markers.  You can buy split ring markers or use small safety pins.  I prefer to use a small length of contrast yarn because I find split ring markers often fall out making you lose your place.  The nice thing about contrast yarn is that you can continue working without moving it every round and you can keep trailing it through your work and pull it out when you're done with it.  One of the most useful tools is to simply count - most decent patterns will state the number of stitches you should have at then end of each round.  Many people obsess over moving their stitch markers at the end of every round, but it is so much easier to learn how to work without them (my stitch markers constantly fell out when I first started out in crochet and I just ended up unravelling my work because I'd lost track of where I'd got to!!!) because if you understand your work, it's so much easier to figure out which point you've reached in your pattern.


Starting

During my time doing crochet, I have come across a two methods of starting working crochet in-the-round.  The first is simply to work two chain and then work the required number of stitches into the 2nd chain from the hook.  I prefer the magic circle method.  Is is not appropriate for all types of yarn, in particular bumpy or lumpy yarns, for which it is best to use the 2-chain method.


The Magic Circle

The magic circle takes a little bit of practise, but once you've got it cracked, it s quite simple.  The right-handed instructions for working double crochets into a magic circle assume prior knowledge of how to hold the hook and the working yarn, working chains, and working double crochets (US singles)


Make a loop around the index and middle  fingers of your left hand such that the working yarn lies on the top of the loop and is crossed such that it is closest to your palm.
 

Pass hook under the strand of yarn closest to the tip of your index finger, and pull the working yarn under to form a loop

You now have one loop on your hook, but it is not yet secured.  The next steps will tie a loose knot

Pass the magic circle to your right hand and hold on to it while you yarn over and pull the yarn through

Pull to close the knot

You will now have a magic circle with a loop attached to it with a sliding knot.  If you pull the tail end of your yarn you can loosen and tighten the magic circle, but don't just yet.

Hold the magic circle open with the free fingers on each hand and work into the circle, making sure to hold the tail yarn together with the left-hand-side of the circle (the two strands can be seen being held under the left thumb) because it will be wrapped under the double crochets as you work leftwards.

Pass the hook into the circle, yarn over

You will have two loops on your hook

Yarn over and draw yarn through both loops on hook.  You will have worked 1 dc into your magic circle

Continue working doubles until the number required for the pattern has been worked.  The photo shows 6dc, as is required for many projects working in the round

Carefully pull the tail yarn to close the magic circle

You are now ready to start working in the round.  It is of course, not necessary to work doubles into the magic circle - trebles or indeed any other stitch can be worked for the first round, just remember to work the correct length chain at the beginning of the round.


Round 2

Round 2 is often a round with two dc worked in each stitch round resulting in double the number of stitches by the end of the round.  Make sure that the hook passes under both loops the stitch

After working the first dc, place your stitch marker to mark the beginning of your round.  I use a piece of contrast yarn


This photo shows the end of the second round.  2dc have been worked into each stitch, there are 12 stitches, and the next stitch has the stitch marker threaded onto it


Managing increase rounds

An increase is worked by simply working two stitches into the following stitch thus increasing the stitch count by one.

If contrast yarn is chosen as the 'stitch marker', there is no need to keep moving it after each round.  It can either be left at the beginning of the work, or woven through the work.  Much of working in the round to make toys involves increasing 6 stitches evenly on every round until the work has reached the required number of stitches.  As a result, an increase stitch is worked into the second stitch from an increase stitch from the previous round until the required number of stitches is reached.  Although you will no doubt count stitches between stitches when you first start out, it really is worth working out how to judge it by eye.  I have highlighted the second stitch of some of the increases with a green arrow.


I prefer not to use stitch markers and simply work an increase into the second stitch of every increase stitch until I reach the required number of stitches.  Take a look at the picture below; work (5 dc, inc) x 6 on the next round.  There are 36 stitches, so 6 rounds have been worked.


Shaping after increasing followed by a straight section

Once the work has reached the required number of stitches, work straight without shaping.  You will probably have noticed by now that crochet worked in continuous rounds has a slight kilter to it - right-handed crochet skews slightly to the right and left-handed crochet skews slightly to the left.  This makes it slightly more difficult to count the number of rounds worked.  I have highlighted the photo with a yellow line to show the first stitch across subsequent rounds and a green arrow to indicate the last increase stitch before the straight section.  With the contrast yarn marking the beginning of the round, 10 straight rounds have been worked since the last increase round + 7 stitches.

As we've already seen, if increasing evenly around on all increase rounds, the increase stitch is made into the second stitch of the previous increase stitch.  I have highlighted the second stitch of the last increase stitch.  If an increase round is to be worked, work 2 dc then inc.  If a decrease round is to be worked, work 1 dc then start the decrease in the next stitch.


You may prefer to weave your contrast yarn through your work:


Decreasing

There are two ways of decreasing when working doubles: dc2tog (double crochet 2 together) and invDec (invisible decrease).  Invisible decrease isn't as invisble as the name suggests, but is it a little less visible than dc2tog.  Try out both methods of decreasing before you decide which method you like best.  Even if you prefer one method, the other method may be better for different yarns.


dc2tog (double crochet 2 together)

Insert the hook under the next stitch, yarn over and draw up loop (2 loops on hook), insert hook into the next stitch, yarn over and draw up loop (3 loops on hook).   Yarn over and draw hook through all 3 loops on hook.

Much like increasing evenly on every round, it is easy to decrease evenly on each round without markers.  The green arrow highlights the decrease stitch.  The second stitch in the dc2tog is worked into the top of the dc2tog from the previous round.  If decreasing evenly on all subsequent rounds, work 2dc then start the dc2tog.


invDec (invisible decrease)

Pass hook under front loop only of next stitch (2 loops on hook)


Pass hook under front loop only of another stitch (3 loops on hook).  Yarn over, draw hook through 2 loops then yarn over and draw hook through final 2 loops.


The grean arrow below indicates an invDec on the round below.  The second stitch in the invDec is worked into the top of the invDec from the previous round.  If decreasing evenly on all subsequent rounds, work 2dc then start the invDec.


The picture below shows two pieces of work in which 6 stitches were decreased evenly across every round to close.  The one on the left was worked using dc2tog, and the one on the left using invDec.


Follow me on Facebook and see what I'm up to at the moment =)

Tuesday, 21 February 2012

Pancakes for lunch. Mmmmm.....

Today is Shrove Tuesday, and it wouldn't seem proper to not eat pancakes at some point today.  And whilst I do love the fluffy American buttermilk ones for breakfast, 'pancake day' always calls for thin crepes.  I decided the kids could have savoury ones with sliced chorizo and grated cheese for lunch.  Yum!
I am amazed at the array of pre-made pancakes and batter mixes that can be bought.  Why buy when they are so simple to make at home?  I follow a very simple rule when it comes to making pancakes and don't weigh my ingredients....  I use a measuring jug.  All you need to make ten 6" pancakes is 2 large eggs, 150 ml semi-skimmed milk (approx), 125 g plain flour (approx), 2 tbsp melted butter, a pinch of salt and some sunflower oil for frying.
  • Crack your eggs into your measuring jug and beat lightly with a fork.  Check how many mls of egg you have.  Two large eggs is roughly 150 ml.
  • Pour in the same volume of milk, and the same volume again of flour, and a pinch of salt.  Beat until smooth then stir in 1 tbsp of melted butter per large egg.
It really is that simple.  Eggs can vary in size and not having to get out the weighing scales is a brilliant time-saver.  If you don't have a measuring jug just use any cup, mug or bowl, first using it to see how much egg you have then just measure out the milk and flour to the same levels.  There's no need to rest your batter unless you're making Yorkshire puddings, so just get on with frying your pancakes.

A non-stick frying pan is essential, and a shallow, light one is even better.  I just use my omelette pan, which makes it a bit awkward to toss but this family loves pancakes so I'm used to it.  I always use sunflower oil but some prefer to fry with melted butter, but be warned, it can burn!  Use a brush to very lightly oil the pan, or a schrunched up piece of kitchen paper works just fine.  When you've ladled your mixture onto your pre-heated frying pan, don't be too impatient - they're not ready to toss or turn until they slide about freely at a shake of the pan.  You might need a few trial runs, but you'll soon get the hang of how hot the pan needs to be and how much batter you'll need =)
Hubby likes plain and simple lemon juice and sugar, but I like mine with chopped banana, vanilla ice cream and chocolate sauce.  Yummy!

Follow me on Facebook and see what I'm up to at the moment =) 

Friday, 17 February 2012

Reduce, reuse, recycle.... Make plarn and tarn

We're always being bugged to reduce our waste nowadays and since discovering how quilting can make use of fabric that would otherwise be thrown away, I've been thinking about how I can make more use of my waste.  And of course plarn (plastic bag yarn) and tarn (t-shirt yarn) sprang to mind.

I've seen a few instructions on making plarn by cutting bags horizontally into rings and then joining them to make a long strip.  The technique I've chosen to use is slightly different and involves cutting a spiral.  Sounds complicated, but it's not.


Take your bag and cut off the bottom:

Cut the bag into 1" (wider if you're using thinner bags) strips, but leave 3" at the end uncut.  I used a rotary cutter so did it on a board, but you could just use scissors.

Now you're going to cut diagonally across the uncut section.  If you cut from the bottom right, cut from the second from the right to the first cut from the right at the top. I slid my cutting mat through the bag so that the cut section lay under it:


Continue cutting until all cuts are joined by a diagonal cut.  Trim the end pieces.

Roll plarn into balls ready to be used


Most of the patterns I've seen seem to use 25-45 bags....  It looks like I'll be collecting bags for a while before I can get started.

The same cutting techniques can be used for making tarn.  The best t-shirts to use are the ones made without side-seams (I've spied a few in hubby's draw, but have to wait until he's ready to throw them out....  It's a shame I can't 'accidentally' shrink them as, incidentally, I did his Merino jumper that now fits me perfectly!)

Follow me on Facebook and see what I'm up to at the moment =) 

Wednesday, 15 February 2012

A demure mermaid dress =)

Disney's Little Mermaid is beautiful but when it comes to giving the doll to a 3 year old who has a 20 month old brother, the scallop shell bikini keeps falling off.  In fact, I have no idea where it currently is.  One of my daughter's storybooks features a Little Mermaid whose fish tail continues up over her boobs like a strapless dress, which gave me an idea for a project to use up some green yarn I found.....

 
I have worked hard creating my original patterns and am happy for them to be used for free.  Please do not sell the patterns.  If you do sell the end products please state clearly that they were made using my design, and that the pattern came from www.craftymamasanchez.blogspot.com.  Thanks, and enjoy!
 
You will need:
  • Yarn that knits to 3mm needles
  • 3mm crochet hook
  • 2.5mm crochet hook
  • Yarn needle
  • Stitch marker

Techniques used (UK terminology):
  • ch: chain
  • slst: slip stitch 
  • yo: yarn over
  • dc: double crochet (US sc, single crochet).  Insert hook, yo, draw hook through both loops
  • htc: half treble crochet (US hdc, half double crochet).  Yarn round hook, insert hook, yo, draw hook through all three loops
  • tc: treble crochet (US dc, double crochet).  Yarn round hook, insert hook, yo, draw hook through two loops, yo, draw hook through two remaining loops
  • inc: work 2 dc into next stitch
  • dc2tog: double crochet 2 together. Insert hook in next stitch, yo and pull up loop (2 loops on hook), insert hook in next stitch, yarn over and pull up loop (3 loops on hook), yarn over and draw through all 3 loops on hook
  • tc3tog: treble crochet 3 together.  Yarn round hook, insert hook in next stitch, yo, draw hook through 2 loops (2 loops on hook), yarn round hook, insert hook in next stitch, yo, draw hook through 2 loops (3 loops on hook), yarn round hook, insert hook in next stitch, yo, draw hook through 2 loops (4 loops on hook), yo and draw hook through all 4 loops
  • working in continuous rounds
  • working rounds by joining

Tail

The tail is worked in crocodile stitch to give the appearance of scales.  It is not as complicated as it looks - all you need is to be able to make chains and trebles.  It is far easier to do than explain, so just pick up your yarn and hook and give it a go.  The tail is worked in the round, and crocodile stitch is even easier when worked in the round!!!

Before you start, it is worth understanding the principles of crocodile stitch.  Each row of scales is formed by working a row of 'skeletons', formed from a pair of trebles separated by a chain, from right to left (for right-handers) which can be charted as below:

The scales are then built by fleshing out the skeletons by turning the work 90 degrees in order to work 5 trebles on the left-most treble (let's call it leg 1), a chain, then turning the work 180 degrees to work 5 trebles on the next treble of the skeleton pair (let's call it leg 2).  The treble of the first scale of each row/round is formed by working 3 ch.  Scales are worked from left to right (for a right-hander), on alternate skeleton pairs.  In order to achieve an interlocking effect, scales are worked such that they alternate on subsequent rows.

When working in the round, an even number of skeletons is worked that is double the number of desired scales.

With a 3mm hook, make 6 ch and join with a slip stitch (don't worry about twisting the chain)
Skeleton round 1:  Working into the circles, ch 3 to form the first tc, 1 tc, ch 1, (2 tc, ch 1) x 7.  Slst to top of ch 3 to join [8 skeletons]


Scale round 1: The hook will now be in the top of a skeleton.  Work the first scale by working 3 ch to form the first tc then 4 tc onto leg 1, ch 1, 5 tc onto leg 2 (refer to chart).  Work 4 scales round, on alternate skeletons.  Slst to corner top of 3 ch to join round.  The scales will 'point downwards' on the work.


Skeleton round 2: (Working right to left), ch 3 to form the first tc, tc between two scales, making sure to work between the pair of tc from the skeleton underneath, ch 1, 2 tc into middle of scale, ch 1.  Continue in this manner to the end of the round, slst to top of ch 3 to join [8 skeletons].  When working a skeleton between scales, always make sure to work between the skeleton.
Scale round 2:  Because of working in the round, in order to create interlocking scales, the skeleton at the beginning of a round will always be worked with scales, and the next one skipped.

Work 6 rounds of 4 scales per round

Increase round:   Ch 3 to form the first tc, tc between two scales.  Ch 1.  Work 2 tc behind the next scale in the ch 1 between skeletons under the scale, ch 1, work 2 tc behind the same scale in the ch 1 between skeletons under the scale, ch 1.  Continue in this way round until there are 12 skeletons, one between each scale and two behind each scale.  It's a confusing round, but the the only of its type in the project (thank goodness!)

Continue working 6 scales per round until the tail measures 18 cm (or just try it on the doll for size and stop when it reaches her waist). 


Dress bodice

The bodice is worked in trebles to give it a bit of stretch.  Slst to join to the first stitch of the round.  Ch 2 to give height (not counted as a stitch) then work the first tc of the round in the same stitch as the slst.


Round 1:  With scales facing, 36 dc round, working through the scales and the skeletons in order to join them.  This is easily done by working 1 dc between scales, 2 dc on the right half of each scale, 1 dc in the middle of each scale and 2 dc on the left half of each scale.  Slst to first stitch of round, ch 2
Round 2:  Change to 2.5mm hook.  36 tc round (see above). Slst to first stitch of round, ch 2
Round 3:  2 tc, tc3tog, (3tc, tc3tog) x 5, tc. Slst to first stitch of round, ch 2 [24]
Round 4-end: 24 tc round

Continue until work measures 24 cm (or until it covers the doll's boobs)


Straps:

Work 5cm chain (I needed 15 ch), slst to 9th stitch.  htc, 6tc, htc, slst, work 5 cm chain, slst to first stitch.  Cut yarn and sew securely, weaving in loose ends.


Tail fins 
Made using continuous rounds.  Do not join or turn work.
Make two

Round 1:  Ch 2, 6 dc into 2nd chain on hook 
Round 2:  2 dc into each stitch round [12]
Rounds 3-5:  Work without shaping for 3 rounds
Round 6:  (1 dc, inc1) x 6 [18]
Rounds 7-9: Work without shaping for 3 rounds
Round 10:  (2 dc, inc1) x 6 [24]
Rounds 11-14: Work without shaping for 4 rounds
Rounds 15-16: 6 dc, 2 htc, 8 tc, 2 htc, 6 dc
Rounds 17-19:  Work without shaping for 3 rounds
Round 20:  (2 dc, dc2tog) x 6 [18]
Rounds 21-22: Work without shaping for 2 rounds
Round 23:  (1 dc, dc2tog) x 6 [12]
Rounds 24-25: Work without shaping for 2 rounds
Round 26: dc2tog x 6 [6]

Sew tail fins to bottom of tail and weave in loose ends

Follow me on Facebook and see what I'm up to at the moment =)